Sunday, December 14, 2008

Gruyere Chicken en Croute


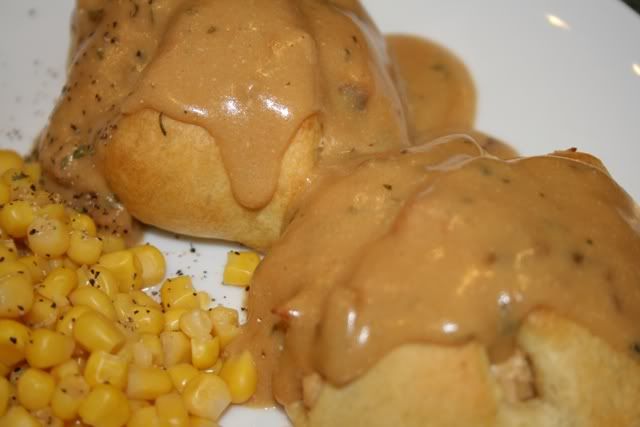
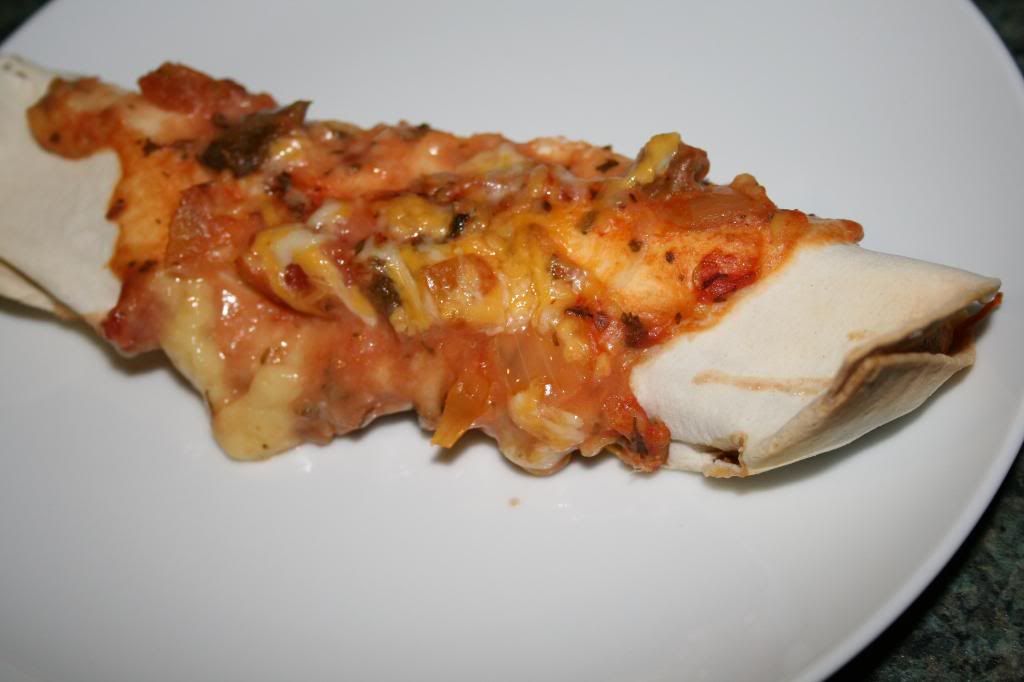
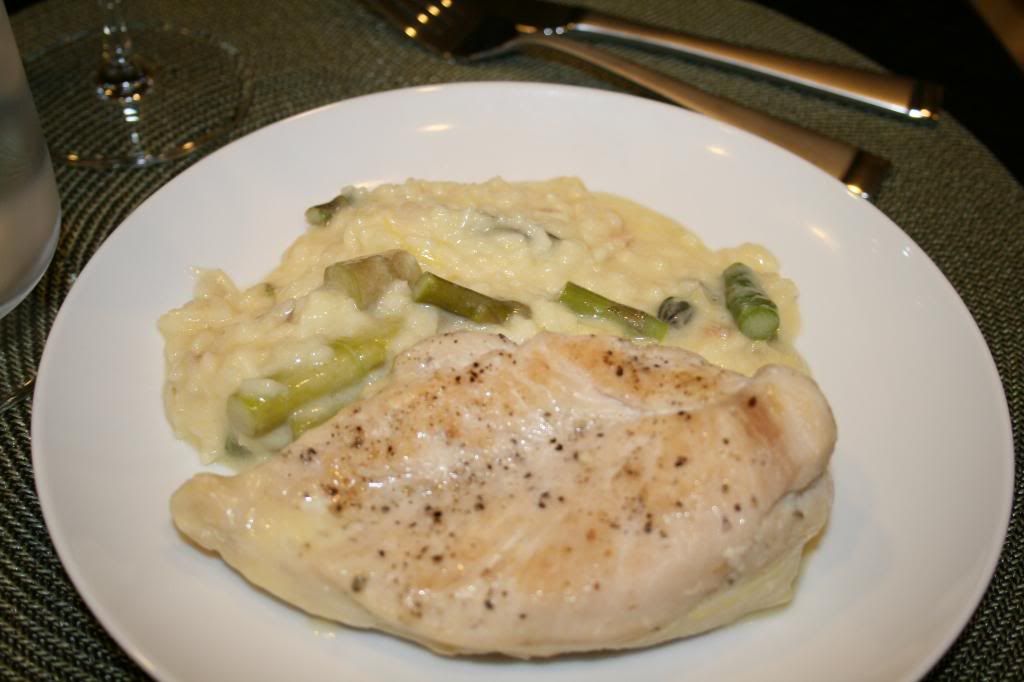
Sounds fancy huh? Yeah...well it was time consuming too. And after those pesky Cinnamon Rolls :::looks down::: this probably wasn't the best dinner to tackle. But I did it. I conquered. And it was goooood. This was a Pampered Chef recipe, so it was fun to get to use lots of my fun tools!

Ingredients

1 package (6 ounces) fresh baby spinach leaves
1 medium onion
1 teaspoon butter
½ teaspoon salt
¼ teaspoon coarsely ground black pepper
1 garlic clove, pressed or chopped
1 jar (12 ounces) roasted red peppers, drained
and patted dry (I just used about 3 decent sized pieces)
1½ cups (6 ounces) grated Gruyère cheese,
divided (yeah...I'm pretty sure I used a significant amount more, but I love cheese)
2½ cups diced roasted chicken (Just needed one massive Sam's Club breast)
24 sheets (9 x 14 inches)thawed, frozen phyllo dough
Nonstick cooking spray

Dijon Cream Sauce (optional)
1 Tbsp butter
1 garlic clove pressed or chopped
1 Tbsp whole wheat flour
1/4 tsp salt
1/8 tsp Cayenne pepper
1 cup milk
1 Tbsp Dijon Mustard


Directions

1) Preheat oven to 400ºF. Chop spinach , Cut onion lengthwise into quarters without cutting through root end. Slice onion, should make small diced pieces. Melt butter on med-high heat. Add onion, salt, black pepper, and garlic pressed or chopped. Cook and stir 2-3 minutes or until onion is tender. Add spinach and cook 2-3 minutes or
until wilted. Drain spinach mixture using a small colander; squeeze dry using paper
towels and set aside.
2) Dice roasted peppers. Coarsely grate 1 cup of the cheese.. Combine roasted peppers, cheese and chicken in Mixing Bowl; stir together and set aside.
3) Unfold one sheet of phyllo onto a large cutting board. Lightly spray with nonstick cooking spray. Finely grate about 1 tablespoon of the remaining cheese over phyllo. Repeat two more times to create a stack of three sheets phyllo, ending with cheese. Place 1 tablespoon of the spinach mixture onto phyllo 2 inches from short end. Place ½ cup chicken mixture over spinach. Fold sides of phyllo in toward center; gently roll up. Place onto baking pan or stone, seam side down. Repeat with remaining phyllo, spinach mixture and chicken mixture for a total of eight bundles.
4) Spray outside of each bundle with nonstickcooking spray. Finely grate remaining
cheese over each bundle. Bake 20-22 minutesor until golden brown. Remove from oven; let stand 5 minutes. Cut bundles in half diagonally.

Serve with Dijon Cream if desired.

Yield: 8 servings

Dijon Sauce instructions:
In a 4qt. casserole melt butter and garlic over medium heat. Stir in flour, salt, and cayenne pepper; stir until smooth. Cook 1-2 minutes, stirring constantly till the mixture has a nutty aroma (do not let mixture brown). Add milk all at once and stir with a whisk until mixture comes to a boil and is slightly thickened. Remove from heat and whisk in Dijon Mustard. Serve immediately.

Ok, so I didn't let the phyllo dough thaw all the way, and some of it broke. So I ended up only making 6 rolls, which is fine, because that still gives us leftovers for lunch tomorrow :)

PW's Sinful Cinnamon Rolls


WARNING: These rolls are bad for you. They are not healthy. I really mean this. If you are on a diet, trying to live a healthy lifestyle, or just cutting back on sweets, please stop. Go no further. If not...come join me in enjoying one of the most delicious sweets known to mankind.

Ok, I'm being lazy. I'm not typing this out, because PW has gone to the effort of putting it in a handy dandy PDF file. Nice huh? Just click here.

The only things I noticed were there was way too much butter. I'd say you only need to spread 1 cup over each rolled out section...not 1.5-2. And then you need to do sort of a roll/flip, because a lot of the mixture will squeeze out if you just roll it. Although, I'm pretty sure you could just ball these suckers up and bake them and they'd still be delicious.

We've already dug into one pan, but the rest are all made up and in the freezer ready to give away for special holiday treats!

Saturday, December 13, 2008

You Should Make This....


Creamy Chicken Pasta with Spinach and Tomatoes

Ok, so I've had this recipe for I don't know how long. And now I'm kicking myself for not making it sooner. I think this is going to give Taco Bake a run for it's money. It's delicious, not horrible for you and it's EASY! I got this recipe all the way from Chicago- well at least my sister that lives in Chicago. I have no clue where she got it. Don't scold me. Go buy the ingredients immediately.

2 cups uncooked pasta (penne)
4 boneless chicken breasts (I just used 2 of my massive ones from Sam's)
1 can of chicken broth
1 package of cream cheese (I used low-fat)
1 package frozen spinach (thawed and drained)
1 tsp garlic, chopped (i just minced 3 cloves)
1 tsp salt
1 tsp pepper
15 cherry tomatoes, halved (about 2 cups)
1/2 cup grated Parmesan Cheese (I bought a block on grated it over the top- fresh)

Ok, so you have your ingredients now? K, good. Now do this:

Cook pasta and drain. Cube chicken breast (1" cubes), heat half the chicken broth in a large skillet and add chicken. Cook until no longer pink (5-7 minutes). Add cream cheese, spinach, remaining chicken broth, garlic, salt and pepper. Heat for 3-5 minutes until cheese melts. Add tomatoes. Cook an additional 2-3 minutes until tomatoes are soft. Toss with pasta and sprinkle with Parmesan Cheese. EAT!

Thursday, December 11, 2008

Pumpkin Pie


I asked my mother-in-law for a good pumpkin pie recipe. She said, I always just use the Libby pie recipe. I thought it was boring, but hey- they are the experts right? So while I've tried other recipes, I always go back to this one. It has the perfect pumpkin flavor. So this fall season...Libby it was.

INGREDIENTS

* 1 (9 inch) unbaked deep dish pie crust
* 3/4 cup white sugar
* 1 teaspoon ground cinnamon
* 1/2 teaspoon salt
* 1/2 teaspoon ground ginger
* 1/4 teaspoon ground cloves
* 2 eggs
* 1 (15 ounce) can LIBBY'S® 100% Pure Pumpkin
* 1 (12 fluid ounce) can NESTLE® CARNATION® Evaporated Milk

* add to recipe box Add to Recipe Box
My folders:
* add to shopping list Add to Shopping List
* add a personal note Add a Personal Note

DIRECTIONS

1. Preheat oven to 425 F.
2. Combine sugar, salt, cinnamon, ginger and cloves in small bowl. Beat eggs lightly in large bowl. Stir in pumpkin and sugar-spice mixture. Gradually stir in evaporated milk. Pour into pie shell.
3. Bake for 15 minutes. Reduce temperature to 350 F.; bake for 40 to 50 minutes or until knife inserted near center comes out clean. Cool on wire rack for 2 hours. Serve immediately or refrigerate. (Do not freeze as this will cause the crust to separate from the filling.)

The Perfect Side Salad


Well, you can hardly call this a recipe, but I had this salad a few years ago at a bridal shower. All the ingredients have very strong flavors, but they compliment each other perfectly! It never fails to satisfy...Lindsay- I know it's veggies, but the blue cheese totally negates any healthiness. Maybe you could give it a go :)

Hearts of Romaine
Green Pepper
Blue Cheese Crumbles
Dried Cranberries
Crumbled Walnuts
Raspberry Vinaigrette

Ok...that's all I'm telling you. Really...I don't know what else to tell you. It's a salad. Just put it together :) Doesn't the picture look good? Mmmmm.

Lindsay's Taco Stuffed Shells


I stole this right off Lindsay's Blog. They looked to be right up our alley and they were! I cut this recipe in half and we barely had enough for the two of us. Next time I would definitely make the whole batch...but then again we like leftovers.

Ingredients

* 1 lb. ground beef (we used ground turkey)
* 1 package taco seasoning
* 4 oz. cream cheese (we used non-fat)
* 12 jumbo pasta shells (we used 16)
* 1 cup salsa (we used a little more)
* 1 cup taco sauce
* 1 cup cheddar cheese
* 1 cup monterey jack cheese
(we used 2 cups Sargento mexican blend)
* 1 1/2 cups crushed tortilla chips (we omitted)
* 3 green onions (chopped)
* Sour cream

Directions

1. In a frying pan cook ground beef; add taco seasoning and prepare according to package directions.
2. Add cream cheese, cover and simmer until cheese is melted. Blend well. Set aside and cool completely.
3. While ground beef is cooking, cook the pasta shells according to directions; drain. Set shells out individually on cutting board/baking sheet so that they don't stick together.
4. Pour salsa on bottom of 9x13 baking dish.
5. Stuff each shell with the meat mixture. Place shells in 9x13 pan open side up. Cover shells with taco sauce.
6. Cover with foil and bake for 30 minutes at 350 degrees.
7. After 30 minutes, add shredded cheese and bake for 10-15 more minutes.
8. Add any condiments you'd like (onions, black olives, etc.) Serve with sour cream and/or more salsa. Enjoy!

Puppy Chow


No, I'm not making my dog homemade food...just yet. But I AM making delicious treats for my friends. I also made this for the Halloween party (hangs head in shame again for being so late). I got this recipe from cooks.com.

CHEX MIX PUPPY CHOW

9 cup Chex
1 cup chocolate chips
1/2 cup peanut butter
1/4 cup butter
1/4 teaspoon vanilla
1 1/2 cup powdered sugar

Put cereal in large bowl. Melt chocolate chips, peanut butter, and butter. Remove from heat and stir in vanilla.

Pour over Chex cereal, put into a large plastic bag with powdered sugar and shake well to coat.

Spread mixture evenly on wax paper and allow to cool.

I swear I'm not behind.....


Ok, so now I realize my blog is totally outing me. Yes, I'm way behind on updating, but these turned out so cute, that I'd rather admit to my lateness than not show you at all! I got the idea from Semi-Homemade with Sandra on the Food Network. There aren't too many instructions, but here goes:


Jack-O-Lantern Strawberries

White Melting Chocolate
Orange Food Coloring (or obviously red and yellow)
Black gel icing (the kind in the small tube)
Fresh Strawberries

Clean and dry the strawberries. Melt the chocolate and add food coloring until you get a satisfactory orange. Dip each strawberry and lay on wax paper to cool. Once they dry, draw jack-o-lantern faces with the black gel icing. Put them in the fridge for about an hour and the black icing will harden up pretty well.

I served these at our Halloween party and everyone loved them. I'll definitely do them again, and I'll probably do some Christmas related ones as well!

Sunday, November 23, 2008

Panko Shrimp & Fried Rice


I found this Panko shrimp recipe on Savory Safari, and while she was daring enough to make her own sweet and sour sauce, we just settled for some yummy red La Choy sauce. So then I needed a fried rice recipe to go with it and found this one from Joelen's Culinary Adventures.

This has quickly become a favorite in our household. It's honestly better than going out to a restaurant.

Fried Rice:
1 cup leftover meats - pork, chicken, beef, seafood (I left this out, but added more veggies than it called for)
1-2 eggs
3-4 cloves minced garlic
1/2 onion finely diced
3-4 tablespoons vegetable oil
1 cup chopped vegetables (fresh or frozen)
salt & pepper to taste
1/2 tablespoon onion powder
1/2 tablespoon garlic powder
1-2 tablespoons light or dark soy sauce
1-2 cups prepared rice, cold (or day old)

In a hot skillet or wok, heat oil.
Add garlic and onions & stir.
Add leftover meats of your choice, chopped up in bite sized pieces.
Stir fry meats until you get them a bit crispy.
Push the meats aside and crack eggs into the pan.
Scramble the eggs into the pan until cooked.
Add cold rice over the eggs & meat into the pan, making sure to crumble it in your fingers. (Dumping a large chunk of rice is not going to work here. You need to crumble it so it separates nicely).
Add salt, pepper, onion & garlic powders and soy sauce; toss.
Allow the rice to heat up and absorb the spices and soy sauce, tossing to help it along.
Add the fresh or frozen veggies and toss into the rice.
Continue cooking it all on high heat until rice is heated through and veggies are cooked.

Panko Shrimp:

Canola oil to cook
Salt and black pepper, to taste
12 large shrimp, peeled and deveined
1 cup all-purpose flour, in a shallow dish
2 eggs, beaten, in a shallow dish
1 cup panko, in a shallow dish

Directions
1. Season the shrimp with salt and pepper. Dredge shrimp in flour, then egg, then panko.
2. Heat oil until shimmering and a sprinkling of flour sizzles and immediately dissolves. Fry shrimp until golden brown, about 3 to 4 minutes total, turning once. Drain on paper towels.

PW's Cowboy Breakfast Sandwich


So...I haven't updated in forever. No, I have not given up on cooking, but we have been trying to keep our new Coney Island in business. Anyway, stop yelling at me or I'll never update again! Here we go.....

Ok, so I saw Pioneer Woman make this breakfast sandwich, and it looked so good that I stopped on my way home from work to get the ingredients. I couldn't stop thinking about it...and so rather than waiting until morning, I made it for dinner! Then when Carl got home at the end of the week, I made them again for breakfast. We both LOVED them!

4 slices of Texas Toast (I used English Muffins)
2 Eggs
2 slices of Kraft Cheese
2 Breakfast Sausage Patties
Jarred Jalapeños
Milk
Mayo (I used Miracle Whip)
A whole lot of butter...mmmm

1. Start to warm up your griddle- either on the oven, or like I use, my stand alone griddle. Fry the sausage patties in a fry pan on the stove, smooshing while you cook them so they flatten a bit. Then set them aside- I put them on a plate and in the microwave so they stay warm. While the sausage is cooking, whisk your eggs with some milk, salt and pepper and set aside.
2. Put some butter on the griddle and fry up the jalapeños, set aside. Coat your griddle with butter again and put your bread or muffins on the griddle. While those are grilling up, pour your egg mixture into the sausage pan...sans sausage of course by now and fold the eggs as they cook. The key is to NOT scramble them but rather create more of an omelet format so you can layer it on the sandwich and it won't fall apart on you.
3. Finally...its time to layer!!! Remove your bread product from the griddle, smear on your Miracle Whip...or if you insist, regular mayo. Then put the sausage patty, layer with egg, top with jalapeños and a slice of good ol Kraft cheese and of course finally another piece of bread. Tada! Delicious breakfast- or if you just can't wait that long, dinner!

ENJOY!

Sunday, October 26, 2008

Cheli's Chicken Crescents


Another recipe I stole from Loves to Nom. I was alone...surprise...and wanted something fairly simple for dinner. I actually had all the items needed for this, so Cheli's Chicken Crescents it was!

Chicken Crescents
Serves 4

You will need:
Oil, cream cheese, chicken, onion, salt & pepper, garlic, cream of chicken soup, sour cream, milk, parsley, 8 count refrigerated crescent rolls.

1. In a fry pan, add a little oil and heat over medium. Take out a half a block (4 oz.) of cream cheese (reduced fat/fat free is fine) and put it in a medium bowl to soften.

2. Add 1 cup of diced onion (vidalia is my favorite) and about 2/3 pound chicken meat. I used tenders this time. Try not to move the chicken around much. Cook it for about 3-4 minutes on the first side and add salt and pepper. Then flip and repeat. When you flip, add a clove or two of minced garlic. I use the jar stuff because I am too lazy to mince/press it myself.

3. When chicken is done, remove from pan to a cutting board to cool slightly.

4. Preheat the oven to 350 degrees, or whatever it says on the crescent roll package.

5. Layout the crescent rolls on a baking sheet. (see picture)

6. Finely dice chicken mixture and add to the cream cheese in the bowl. Mix.

7. Spoon a large scoop of the mixture onto the fattest part of each crescent roll. Then fold up the short corners. Then fold up and wrap around the long corner. Don't worry if the chicken peeks out.

8. Pop in the oven per crescent roll directions (usually 11-13 minutes). They will probably be done in the shorter amount of time.

9. While baking, in a small saucepan over low heat combine the following:
3/4 can of cream of chicken soup
1/2 cup sour cream
Few splashes of milk
Palmful of dried parsley

10. When crescents are done, spoon some of the sour cream sauce onto a plate. Set 2 crescents on top of the sauce (it looks prettiest this way haha). Enjoy!

Notes: I have to admit, I felt this was lacking something. But when I mentioned to Shelly that I thought it needed some spice, she said everything she makes is spicy, and she needs to give Matt's stomach a break once in awhile. But it did make some wonderful lunch leftovers!

Making Meatballs Part II


Today, we are making meatballs sweet and sour style. So as stated in Making Meatballs Part I, I doubled the recipe and froze half of the cooked meatballs. If you have an interest in both these recipes, I HIGHLY recommend doing this. The meatballs take awhile to make, but freeze very nicely. So...make the meatballs, or if you are a smart cookie...defrost them.

1lb hamburger
1/2 c bread crumbs
1/4 c milk
2 tbsp onion
1 tsp salt
1/2 tsp Worcestershire sauce
1 egg

Mix all the ingredients together in a large bowl. Create balls a little smaller than a golf ball. Cook over medium heat for about 20 minutes. Remove from pan and set aside.

Ok, so now let's get to the saucy part.

1/2 c packed brown sugar
1 tbsp cornstarch
1 can pineapple chunks
1/3 c vinegar
1 tbsp soy sauce

Mix brown sugar and cornstarch in skillet. Stir in pineapple with syrup, vinegar and soy sauce. Heat to boil stirring constantly. Reduce heat, add meatballs, cover and simmer stirring occasionally for 10 minutes.

Notes: SUPER YUM! Really, these are awesome. That's coming from the girl that doesn't like balls of meat. And the leftovers are just as good. I served this over a bed of rice...mmmm now I want these again.

Saturday, October 25, 2008

Making Meatballs Part I


I made these so long ago, I honestly can't remember when it was. I was procrastinating posting it because well honestly, I didn't think they looked very nice. But gosh darnit...they were tasty! So a blog entry they rightfully deserve! This recipe is from my father-in-law, and while I'm not typically a fan of balls of meat, I do enjoy these.

Traditional Meatballs with Gravy

1lb hamburger
1/2 c bread crumbs
1/4 c milk
2 tbsp onion
1 tsp salt
1/2 tsp Worcestershire sauce
1 egg

Mix all the ingredients together in a large bowl. Create balls a little smaller than a golf ball. Cook over medium heat for about 20 minutes. Remove from pan and set aside.
Add about 1 cup of beef broth and 1 tbsp cornstarch. These amounts are approximate- but it is simply to make gravy- so just add until you get a consistency you like.

Notes: Ok- we doubled the recipe and froze half of the meatballs with our food saver...the next post shows what we did with them.

Tuesday, October 7, 2008

Chicken Cacciatore


I was alone for dinner tonight, but was sick of eating crappy food....so tonight I decided to actually cook for myself. My mom, the full-time worker/full-time house mom sometimes had to cut corners to save time. So her version of Chicken Cacciatore included a jar. I still loved it all the same, but for myself I wanted to try one from scratch. So I browsed Cooks.com and found this recipe. I have to say, it was pretty darn good! I scaled it down a bit since I only wanted enough for me tonight for dinner and tomorrow for leftovers- but I'll just give you the full recipe.

CHICKEN CACCIATORE

1 lb. boneless chicken
1/2 c. chopped onion
1 garlic clove, minced
2 tbsp. oil
1 (28 oz.) can tomatoes
1 (8 oz.) can tomato sauce
1/2 tsp. salt
1/2 tsp. oregano
1/2 tsp. basil
1/8 tsp. crushed red pepper
1 c. green pepper strips
1 1/2 c. rice

Cut chicken into strips; brown lightly with onion and garlic in oil. Drain off all oil and drippings. Add tomatoes, tomato sauce, seasonings and green pepper. Bring to a full boil. Turn down heat. Stir and simmer about 20 minutes. (Can simmer longer.) Make rice. Serve cacciatore over rice, or to side. Serve with vegetable and-or salad. Makes 4 servings.

My Notes: This was really good, although next time I think I'll use more paste than I did. I think I skimped a little too much, and I would have liked the consistency a little better if it were thicker. Otherwise- delicious!

Thursday, September 25, 2008

Big Carl's White Chicken Chili


Ok, so I actually made this on Monday (not that you care) to start off the "feel like home" week for Carl. I call his dad Big Carl, since they call my Carl, Little Carl. So "Big Carl's White Chicken Chili" it is! I'd say I hit the nail on the head with this one!

1 1/2 -2 pounds cooked boneless, skinless chicken- cubed (I just cook mine in a little water in a skillet)
2 14oz cans of chicken broth
1 480z can of white northern beans
2 c finely chopped whit onion
2 tbsp fresh minced garlic
1 small can chopped green chilis
2 tsp cumin (heap if you like it hot)
2 tsp oregano
1/4 tsp cayenne pepper (more if you like it hot)

Saute onions and garlic in 1 tbsp olive oil until onions are tender. Stir in the green chilis.

Mix all into big pot with the chicken. Heat until boiling, simmer for 10-15 minutes. The longer you cook it, the more tender the chicken will get.

My Notes: This is the perfect fall recipe! Drop a spoonful of sour cream and sprinkle with cheese for the ultimate flavor explosion! It makes enough to feed 6 adults easily. We had this two nights in a row and then I took the remainder to work and shared with a co-worker. He was also a huge fan. We will definitely make this again and again!

Shelly's Nomilicious Chocolate Chip Cookies


I stole this recipe right from Shelly of Loves to Nom. This is probably the best thing I've ever stolen. I am holding myself back from eating every single one over here! Anyway, I made this in honor of Shelly and Matt who are getting married on Saturday! Congrats you two!

Chocochip Cookies

Yield: 15 cookies


1. Set out a stick of unsalted butter to soften ahead of time. In a pinch you can microwave the stick very quickly (like 10 seconds) to soften it. But if you melt it, the consistency of the cookies will change.


2. Preheat the oven to 350.


3. In a large mixing bowl, with a hand/stand mixer cream together the following:


* 1 stick softened (1/2 cup) UNSALTED butter (not margarine)

* 1/4 cup granulated white sugar

* 3/4 cup packed light brown sugar

* 1 egg

* 1 1/2 teaspoons real vanilla extract (don't mess with that imitation crap)


4. In a small bowl, sift/mix together the following:


* 1 1/4 cup all-purpose flour

* 3/8 teaspoon salt (I prefer kosher for baking)

* 1/2 teaspoon baking powder

* 1/2 teaspoon baking soda


5. Slowly beat the dry ingredients into the wet.

6. Stir in about 9 ounces (3/4 of a bag) chocolate chips. I like to mix half semi sweet and half milk chocolate. I think it really 'makes' the cookie.

7. Scoop dough onto an ungreased cookie sheet. Make sure there is about 2 inches between each ball.

8. Bake for approximately 9 minutes, depending on how you like your cookies. Matt prefers his cookies on the (super) soft side. Cookies are done when the edges are lightly browned and still appear moist in the middle.

9. Take pans out and let cookies cool on the pan for 2-3 minutes. Then remove the cookies to a cooling rack, countertop, wax paper, whatever to cool completely... or at least until they are cool enough to devour with a big glass of milk! Enjoy!

My Notes: I actually had to cook mine for more like 11 minutes as opposed to 9. Remember people- ovens vary!

Chicken Piccata


Ok, so this week I was making Carl "feel at home" by making all the dishes he used to have at his parents' house. His dad normally cooks and so I stole all his yummy recipes!! (These are actually out of order, because I'm blogging in multiple places...and only have certain recipes here)

Wednesday's Meal: Chicken Piccata

So- apparently somewhere between my in-law's place and ours, I lost my instructions...so I just kind of put this together by looking at a couple recipes from Food Network and All Recipes that reminded me of what my father-in-law said. It turned out fabulous if I do say so myself though!

INGREDIENTS

-1 cup all-purpose flour
-1/2 teaspoon paprika
-1 pound skinless, boneless chicken breast halves - cut into thin square-like -1/4 cup olive oil
-1/4 cup lemon juice
-1/2 cup chicken stock-
1/2 cup white cooking wine
-1/2 teaspoon garlic powder
-1 (14 ounce) can artichoke hearts, drained and quartered
- 1 small can of mushrooms
-2 tsp capers


DIRECTIONS

1. In a shallow bowl, mix together flour, paprika, and salt and pepper. Dredge chicken pieces in the seasoned flour.
2. Heat oil in a large skillet over medium heat, and saute chicken until light golden brown (about 2 minutes each side). Remove chicken from skillet, and set aside.
3. To skillet, add mushrooms, lemon juice, wine and chicken stock. Simmer until a smooth, light sauce develops. Season with garlic powder. Return chicken to the skillet, and simmer until chicken is no longer pink and juices run clear. Stir in artichoke hearts and capers, simmer for about 2 minutes. Remove from heat and enjoy!

Notes: This easily will feed 4 people. I served it over a bed of rice pilaf which is the perfect complimentary dish! I plan on just having the leftovers for dinner tonight. Super delicious. And when I said to Carl- it's good, but it's not like your dads. He said- yeah, but I think it's better! Woo HOO for me!

My Own Easy Beef Enchiladas


I could eat Mexican pretty much every night, seriously. But that would make for a boring blog, so I have to mix it up occasionally. Luckily though, I haven't blogged these bad boys yet, so now...for your viewing (and perhaps one day eating) pleasure, behold: MY SUPER EASY BEEF ENCHILADAS!

Ingredients:
1 lb ground beef
1 packet taco seasoning (I always use Ortega)
1 cup cooked white rice (yes that says cooked. I'm not explaining how to cook it, just do it now)
1 can refried beans (not warmed!)
1 can cream of chicken soup
1 jar of salsa
10-12 burrito size tortilla shells
2 cups Colby Jack Cheese (or whatever yummy blend you'd like)

Instructions:
1. Preheat the oven to 350 degrees. Grease a 9x13 pan. Brown the ground beef and drain. Add taco seasoning and 1 c water. Simmer for about 5 minutes. Add in the rice and stir it up real good!
2. Take the tortilla, spread a spoonful of refried beans on the tortilla. Spread 1/4 c of the meat mixture on top of that. Sprinkle with cheese and roll it up. Put the rolled tortilla seam side down into the 9x13 pan. Repeat until all your tortillas are gone- or the meat mix is gone.
3. Combine the cream of chicken soup and the jar of salsa in a bowl. Mix well. Pour the mix over the tortillas in the pan. Sprinkle with the remainder of the cheese.
4. Put the pan in the oven for 30 minutes or until the edges are slightly golden brown. Remove, cool and enjoy! I like to serve with a side of sour cream and sometimes extra salsa. YUM!

Notes: Ok, so I used to use an actual recipe for this, but now I just do my own thing...so I'm calling these mine. Really, they are easy and quick and ALWAYS get rave reviews. Plan on each person eating two enchiladas if you don't serve it with anything else.

Sunday, September 14, 2008

Elegant Chicken Rolls


Alright, yet another Pampered Chef recipe. I'm running out of new ones in my cookbook, but I'm not done yet! I was this > < close to just ordering pizza tonight, but I pushed on and decided to make these chicken rolls. I served them over rice pilaf with a side of steamed asparagus. These were really flavorful and I would definitely make them again...and again!

Ingredients:
6 boneless, skinless chicken breast halves (4-6 ounces each)
4 ounces cream cheese softened
4 ounces crumbled feta cheese
2 tbsp fresh basil leaves snipped
1/2 tsp coarsely ground black pepper
6 tbsp sweet roasted red peppers, drained, chopped
1 1/4 cups seasoned croutons, grated (1 cup crumbs)
1 egg
1 tbsp milk
12-18 large spinach leaves
6 ounces thinly sliced deli smoked ham

Instructions:
1. Preheat oven to 375 degrees. Butterfly cut each chicken breast half by inserting tip of knife into thickest side of chicken then cutting lengthwise through middle of breast, almost through to the other side. Spread chicken breast open flat. Place each chicken breast between 2 pieces of parchment paper. Flatten chicken to 1/4 inch alternating pounding and rolling.
2. In small mixing bowl, combine cream cheese, feta, basil and black pepper; set aside. Chop red peppers and drain on a paper towel. Grate croutons into a shallow bowl- if you have a cheese grater that works great. You can also just smash them in a plastic bag. Combine egg and milk in another small mixing bowl.
3. For each chicken roll, cover chicken breast with single layer of spinach rolls, about 2 tbsp of the cheese mix, 1 tbsp of the red peppers and then one slice of the ham. Roll up, jelly-roll fashion, tucking in ends when possible. (mine were too small, so I used a metal cooking pick to hold them together- worked great!)
4. Dip rolls in egg mixture; coat with crumbs. Place seam side down in a baking dish and bake for 35 minutes or until chicken is no longer pink and juices run clear.

Notes: I had some issues with cutting them butterfly style- I blame it on my chicken. It worked out fine though, I just ended up with smaller rolls. Also- it took mine more like 45 minutes in the oven. It might have been me just being paranoid about chicken, but I'm pretty sure it was still fairly pink at the 35 minute mark. Just keep an eye on it either way!

My Mom's Chili


As a kid, one of my favorite fall/winter dinners was my mom's chili. She uses the seasoning kit pictured, but does it a little different than what the package states. Be warned though: this makes a crap ton of chili! You could easily cut this in half and still feed 6 hungry growing boys. We usually have leftovers for 3 days...(and we usually are sick of chili by day 2). It's alright though...this chili is worth the excess!

Ingredients:
1 Carroll Shelby's Original Texas Brand Chili Kit
1 large can of crushed tomatoes (like the 30 oz size) or two regular cans
1 can of tomato sauce
2 lbs ground beef
1 can of chili beans (size is to your discretion depending on your love of beans-I use one very large or 2 regular)

Instructions:
Brown ground beef in skillet and drain grease. Dump ground beef into stockpot (at medium heat) and add crushed tomatoes, tomato sauce and 1/2 can (15 oz) of water. Add in the chili seasoning packet (the big packet), the salt packet, and unless you want your tongue to literally fall off, just half of the cayenne powder. Mix all that together.
Next, fill the can 1/2 with water and add the masa packet (the white packet)and blend together. Add to the chili mix. Continue to stir and simmer for about 15-20 minutes. The chili will thicken up quite nicely, that's when you know it's done!

Notes: Can I really consider this homemade? Probably not. Could I create my own chili figuring out exactly which spices to use? Probably. Do I want to? Probably not. Honestly, this is the best hearty chili I've ever had, and you know me, I'm not one to mess with perfection :)

Thursday, September 11, 2008

Mini Glazed Lemon Cakes


We skipped dessert last night...oh the horror! So tonight had to be better than a stale cookie. I picked this one out of the "Season's Best 2008 Spring/Summer" from Pampered chef.

Cakes
2 T butter, softened & divided
2 T sugar
2 small lemons, divided
1 pkg (9 oz.) yellow cake mix
1 egg
1 8 oz. container sour cream

Glaze
2 T lemon juice (from lemon used for cakes)
2 T butter
1/4 C sugar

1. For cakes, brush 6 Prep Bowls with 1 T butter; sprinkle with sugar. Thinly slice one of the lemons. Remove any seeds from the lemon slices and place one slice in the bottom of each bowl; set bowls aside.

2. Zest remaining lemon and measure 1 T of zest; set lemon aside for glaze. Place remaining 1 T butter into microwavable bowl; microwave on high 15-20 seconds or until melted. Add lemon zest, cake mix, egg, and sour cream; whisk 1 minute or until smooth (batter is pretty thick). Scoop batter evenly into prepared bowls. Place bowls in circle on microwave turntable. Microwave on high 4-5 minutes or until wooden pick inserted in centers comes out clean (cake still looks slightly wet). Carefully remove cakes from microwave; cool in bowls for 5 minutes.

3. Meanwhile, for glaze, juice reserved lemon to measure 2 T juice. Melt butter. Stir in lemon juice and sugar; microwave on high 30-60 seconds or until boiling.

4. To serve, gently tap sides of bowls to release cakes. Transfer to serving plates and drizzle glaze over cakes.

Notes: Ok, so this is the sitch. I had the precious 6 prep bowls this recipe refers to, but somewhere along the way, I've ended up with like 4...and 1 of them wasn't available. Time to improvise!! Since there was only two of us, I just split the batter between my two smallest pyrex bowls- my guess is they are about a 4 cup size. I also made the mistake of not realizing that a standard cake box is about 18 oz- not 9 oz. That changes a lot! ;) Anyway, I made it work and they were delicious.

Florentine Shells


Carl has often complained that he thought he was getting himself an Italian girl, but this isn't what he expected. Well, I am Italian by genetics, but hardly in the kitchen. I promised him I would work on it. Part of the problem is I hate meat in my pasta- but stuffed shells are easily made without meat and still hearty enough to handle Carl's appetite. I served this with a light spinach salad and some Texas Toast. All it needed was a glass of wine, but Carl had already poured the milk :(

Ingredients
* 18 jumbo pasta shells (I use Barilla brand)
* 1 container (15 ounces) part skim Ricotta
* 1 package frozen spinach chopped, thawed, and drained and squeezed dry
* 2 cups shredded Italian cheese blend
* 3/4 cup half and half (divided)
* 1 garlic clove pressed
* 1/2 tsp. dried basil
* 1/4 cup Parmesan cheese
* 1/2 tsp. dried oregano
* 1/8 tsp. salt
* 28 oz. jar of spaghetti sauce

1. Preheat oven to 350, cook pasta according to directions, drain.
2. Mix ricotta, spinach, 1 1/2 cups of Italian cheese, 1/4 cup of Parmesan, and 1/4 cup of half and half. Press in garlic and seasonings. Mix well.
3. In another bowl whisk the rest of spaghetti sauce with remaining half and half. Pour half of sauce mix on bottom of cooking pan. Fill each shell with ricotta mixture, I use my medium Pampered Chef scoop- its perfect!. Arrange filled shells in baking pan. Top with remaining spaghetti sauce.
4. Cover with foil, bake for 40 minutes. Remove foil, top dish with remaining 1/2 cup of Italian cheese. Bake uncovered an additional 5 min. Let cool for 10 min. before serving. Enjoy!

Yield: 6 Servings
Notes: I actually used fresh spinach and just chopped it in my mini processor. Not sure if it made any difference, but I had a big thing of spinach that I needed to use. I also doubled the garlic...naturally!

Spicy Beef & Broccoli Stir-Fry


Brought to you right from the kitchen of...Carl. I honestly had full intentions of making dinner, but I wasn't feeling great and he offered, how could I say no? Anyway, it turned out great and I would definitely make it again!

Ingredients:
1/4 c light soy sauce
1 tbsp cornstarch
2 tbsp vegetable oil, divided
1 boneless beef top sirloin steak, trimmed (1 1/4 lb)
3 c broccoli flowerets
1 medium onion
1 medium red bell pepper
2 garlic cloves, pressed
1 tsp peeled fresh ginger root, finely chopped
1/4 tsp red pepper flakes
1/2 c beef broth

Instructions:
Whisk soy sauce, cornstarch and 1 tbsp of the oil in a medium mixing bowl. Cut the steak lengthwise in half and then crosswise into 1/4 inch thick strips. Add beef to soy sauce mixture; toss to coat. Cover and refrigerate 15 minutes to marinate.
Meanwhile, cut broccoli into flowerets and onion into thin wedges. Cut bell pepper into thin strips, 2 inches long. Set vegetables aside. Press garlic and finely chop the ginger root.
Heat 1 tsp of the remaining oil in a skillet over medium high heat until hot. Add half each of beef, garlic, ginger and red pepper flakes to skillet. Stir-fry 1-2 minutes or until outside surface of beef is no longer pink (do not overcook). Remove from skillet; keep warm. Repeat with 1 tsp of oil, remaining beef, garlic, ginger and red pepper flakes. Remove from skillet.
Heat remaining 1 tsp oil in same skillet until hot. Add broccoli, onion and bell pepper; stir-fry 3-4 minutes or until vegetables are crisp-tender. Return beef to skillet; add broth. Bring to a boil. Boil 1 minute, stirring gently, until sauce is slightly thickened. Enjoy!

Yield: Enough for the two us to have good sized dinners and me to have a decent sized portion for lunch the next day.

Notes: We served this over a bed of rice and it was really good. It was even better than I thought it would be! My only suggestion is that if you like spicy- at least double the red pepper. It wasn't really spicy at all. If you don't like much spice, leave as is. All in all...it was good and will hold a spot in our rotation!

Monday, September 8, 2008

Broiled Marinated Steak


I walked into the house to see my kitchen and family room completely disheveled. Carl decided to install the rear surround sound speakers in the ceiling today, nice. Good thing my dinner was a relatively simple and easy one. Again, not much of a recipe, but it was good...so it gets a post :)

Marinated Steaks:
2 top sirloin steaks
1 c BBQ marinade

We marinated them for about 3 hours. Then I broiled them for about 7 minutes on each side for me (I like it pretty rare) and 8 minutes for Carl (more medium rare). I really like broiling steaks when the grill isn't an option. (Carl was busy, it was drizzling...broiler it was)

Then I just steamed some green beans and made some butter noodles with the help of Lipton :).

Pumpkin Choc Chip Cookies


I yanked this recipe right from Shawna on Daily Deliciousness. As much as I am not ready for fall, these pumpkin cookies jumped off the computer screen at me.

Pumpkin Choc chip cookies
allrecipes.com

INGREDIENTS
* 1 cup canned pumpkin
* 1 cup white sugar
* 1/2 cup vegetable oil
* 1 egg
* 2 cups all-purpose flour
* 2 teaspoons baking powder
* 2 teaspoons ground cinnamon
* 1/2 teaspoon salt
* 1 teaspoon baking soda
* 1 teaspoon milk
* 1 tablespoon vanilla extract
* 2 cups semisweet chocolate chips
* 1/2 cup chopped walnuts (optional)


DIRECTIONS
1. Combine pumpkin, sugar, vegetable oil, and egg
In a separate bowl, stir together flour, baking powder, ground cinnamon, and salt. Dissolve the baking soda with the milk and stir in.
Add flour mixture to pumpkin mixture and mix well.
2. Add vanilla, chocolate chips and nuts.
3. Drop by spoonful on greased cookie sheet and bake at 350 degrees F (175 degrees C) for approximately 10 minutes or until lightly brown and firm.

Yield 3 dozen cookies


My notes- I used both the chocolate chips and walnuts. Next time I will try just the walnuts...but like double the amount. To me, I couldn't get into the chocolate/pumpkin mix, but the pumpkin/walnut bites were delicious! I also took Shawna's advice and baked them at 365 degrees for 12 minutes. That was perfect, but I'm not sure that the 10 minutes at 375 degrees wouldn't have been.

Sunday, September 7, 2008

Tropical Chicken Fajitas


I told Carl to pick tonight's dinner. He chose chicken fajitas. He's been missing his grill. Really, this isn't a recipe, but I'll throw in my few tips for fajitas here. We used 2 large chicken breasts, Kroger's Spicy Tropical Mango 30 Minute Marinade, a quarter of each of a green, red, orange and yellow pepper, a 1/4 red onion- sliced, sour cream, cheese and salsa. We grilled both the chicken and vegetables for about 10 minutes. I also made Zattarans Black Beans and Rice. It was pretty delicious if I do say so myself!

A food saving tip! When you don't need to use the whole pepper or onion- wrap it in a paper towel before putting it back in the bag. Trust me...it will last so much longer!

Molly's Mexican Dip


I've made this dip so many times and when my sister said she was lacking appetizers for my nephew's birthday party, I jumped at the opportunity to make it.

Ingredients:
1/4 c sour cream
8 oz cream cheese
1 jar of salsa
2 cups shredded monterey jack/colby cheese
1/4 c chopped olives
1/4 c sliced green onions

Instructions:
Preheat the oven to 350 degrees. Mix together the cream cheese and sour cream in a small mixing bowl until smooth. Spread the mix into a 9 inch pie plate. Cover with salsa, then cover with the cheese. Sprinkle with the olives and place in the oven for about 15 minutes. Remove and sprinkle the onions- serve with tortilla chips.

Please forgive me for the craptastic picture. I knew this dip wouldn't last long so I took it while it was in the oven...before I even put on the onions. It was a good thing I did...it got devoured immediately!!!

Thursday, September 4, 2008

Monica's Peanut Butter Squares


Ok, so tonight's food consisted of all knottie inspired items. Monica posted this on her blog today, and it read Carl from top to bottom. Not to mention it looked super easy- which reads Molly all over! We've still be on a dessert kick (not the best "kick" to be on but whatever) and so I wanted something better than our oreos and milk from yesterday. Although, this one also needs a glass of milk on the side!!

Ingredients
3/4 cup melted butter
2 cups graham cracker crumbs
12 oz crunchy peanut butter
2 cups powdered sugar
12 oz melted chocolate chips

Instructions
Combine butter and graham cracker crumbs, mix in sugar and peanut butter. Spread in 13 x 9 pan. Pour chocolate over the mixture. Chill.

My notes: Yes, I made this the same, and yet Carl said "Monica's looked thicker" (insert pouty look here) Whatever. It still tasted delicious!

Lindsay's Taco Bake


Ok, I needed something that didn't take much effort, and when I say not much effort I mean taking extra time to search for a recipe. This one has been raved about on The Knot thanks to iheartkeith, and I finally decided to give it a whirl.

Ingredients

* 1 lb ground beef (or ground turkey, or ground chicken)
* 1 packet taco seasoning
* 15 oz. tomato sauce
* 8 oz. seashell pasta
* 8 oz. package cream cheese, softened in microwave
* 1/2 cup sour cream
* 8 oz. shredded sharp cheddar cheese

Directions

1. Brown ground beef, drain. Add taco seasoning and tomato sauce. Bring to a boil and then simmer for 20 minutes.
2. In the meantime, cook pasta according to directions. Drain.
3. Mix softened cream cheese and sour cream in separate bowl.
4. Spray bottom of 9x13 pan. Put pasta in bottom of pan.
5. Spread cream cheese mixture over pasta.
6. Spoon ground meat mixture over this.
7. Sprinkle shredded cheese on top.
8. Bake @ 350 degrees for 30 minutes. Let cool 15 minutes before serving.

My notes: I cut the entire recipe in half and it was perfect. Other than that...I'll just let this last picture do the talking:

Wednesday, September 3, 2008

Ground Beef Casserole


1 lb ground beef
1 small onion diced
1 large can of tomato soup (regular can works too...)
1 can green beans
1 can corn (really you can use whatever vegetables you want, these are just my favorites and I always have them around)
Mashed potatoes for about 6 people (instant is ok too)
Salt/Pepper
Other spices (you'll see my suggestions below)

Make the mashed potatoes. Heat the oven to 350. Brown the ground beef and throw in the onion. Drain the beef. Feel free to add whatever spices you have laying around- I like garlic powder and chili powder but really...whatever you've got. And season with salt and pepper! And of course a package of onion soup mix is always approved per monica if you really want it.

Spread the beef into a 9x13ish casserole pan (i use my pampered chef deep dish baker- because it is biiiiig). Then spread the uncooked green beans and corn over that. Then poor the tomato soup over the entire thing and add about a half a can of water to make sure the whole thing has some juicy goodness going on. Top with the mashed potatoes over the top and bake for about 25 minutes or until the edges start to get brown.

I really love this casserole...but definitely add the salt and pepper- it needs it! As you can see...I really don't have set amounts. We'll call this Shelly Cooking...or grandma cooking. My sister gave me an actual recipe but I used it like 2 times and then never needed it again. You can blame me if it turns out bad...but I haven't had that happen yet.

Sunday, August 24, 2008

Best Dinner Yet

Carl decided he wanted to have his parents over for dinner. I obliged and said we should make a rockin dinner. That we did. I don't think I've ever had a dinner with so much flavor. The IL's kept saying they felt like they were eating at a restaurant :) The menu consisted of Grilled Steak with Blue Cheese & Herb Butter, Mediterranean Orzo Salad and Roasted Potato Bites. First up...the beef.

Blue Cheese & Herb Butter
1/4 c butter, softened
2 tbsp crumbled blue cheese
2 tsp chopped green onion with top
1/2 tsp fresh lemon juice
1/4 tsp coarsely ground black pepper

Steaks
4 garlic cloves, pressed
4 beef ribeye steaks, cut 3/4 inch thick (about 8 ounces each)
1/2 tsp salt
1/2 tsp coarsely ground black pepper

For Blue Cheese and Herb Butter, place butter and blue cheese in a small bowl. Add green onion, lemon juice and black pepper and mix until well blended.

Prepare grill for cooking at medium temperature. For steaks, press garlic cloves and spread over both sides of the steaks. Sprinkle with salt and pepper.

Place steaks on grid of grill. Grill uncovered, 6-8 minutes for medium rare (145 degrees) to medium (160 degrees) doneness, turning occasionally. Top steaks with Blue Cheese & Herb Butter.

Notes: I was more in the mood for a filet...so we did that instead. Because of that, the cooking time was more like 12 minutes due to the thickness of the steaks. Other than that...we left it all the same. OMG- so good! (Lindsay, my fellow blue cheese lover,...if you are reading this- make it now!

Next up: Roasted Potato Bites
12 small red potatoes, unpeeled
1 tbsp olive oil
2 garlic cloves, pressed
1/2 tsp salt
1/4 tsp ground black pepper
4 ounces chive and onion cream cheese spread
3 tbsp sour cream

Optional toppings such as grated cheddar cheese, bacon bits and snipped fresh chives.

Preheat oven to 425 degrees. Cut potatoes in half crosswise. Cut a thin slice off the bottom of each potato half. Carefully scoop out a small amount of pulp from each potato half. In medium mixing bowl combine oil, garlic, salt and black pepper. Add potato halves and toss to coat.

Place potato halves, hollowed side down, on a bar pan or cookie sheet. Bake 30-32 minutes or until deep golden brown and tender. Remove from oven, cool slightly.

In small mixing bowl, combine cream cheese spread and sour cream; whisk until smooth. Spoon a dab onto each potato and top with optional toppings.

Notes: I just used 8 potatoes because there were only 4 of us, but I still just made the normal amount of everything. That worked out well as the sour cream and cream cheese mixture was so good I wanted to use WAY more than it called for on each potato. These were seriously so good. I could have made a meal out of them alone.

And Last: Mediterranean Orzo Salad


(Monica...this one is for you :) )
1 pound asparagus spears, trimmed and in 1 inch pieces
1 large red bell pepper, cut into 1 inch pieces
1 medium red onion, sliced into 1/2 inch wedges
1 tbsp olive oil
2 garlic cloves, pressed
Salt and coarsely ground black pepper optional
3/4 c uncooked orzo pasta
1 can garbanzo beans
1 package (4 ounces) crumbled feta cheese
1/2 c pitted whole kalamata olives
1/2 c snipped fresh parsley
1/4 c prepared Greek vinaigrette dressing

Preheat oven to 450 degrees. Combine asparagus, bell pepper, onion and oil in a medium mixing bowl. Press garlic into mixing bowl; toss to coat. Season with salt and pepper if desired.

Arrange vegetables on a bar pan (or cookie sheet). Bake 25-30 minutes or until vegetables are tender and deep golden brown. Remove from oven; cool completely.

Meanwhile, prepare orzo according to package directions, drain and rinse under cold running water. Place orzo in large mixing bowl, add vegetable mixture, beans, feta cheese, olives, parsley and salad dressing. Toss gently and refrigerate for 30 minutes or more.

My Notes: Soooo much flavor. And since I had to send Carl on a mad search for orzo, I did things a little out of order- but it worked fine. It made enough for about 12 people- this could be a great dish to take to a gathering. The salad definitely got better the longer it sat in the fridge and I'm pretty anxious to see how good it is after sitting overnight. Yum.

I was honestly pretty proud of this meal- it took a good hour and half or so, but it was worth the time and energy!! Oh and sorry...the pic isn't really the greatest. I was too excited to eat it!

German Apple Pancake


I contemplated making a fancy breakfast on Saturday morning, but I realized we had too much to do, so Carl just made a donut run. Well this morning I woke up and found Carl looking at the cookbook with the "fancy breakfast" I was > < this close to making. I knew he was desperate for something more than cereal. So...

Apple Filling:
1 small Granny Smith apple
2 tsp butter or margarine
1/4 c packed brown sugar
1 tsp cinnamon

Pancake
1/2 c all-purpose flour
1 tbsp granulated sugar
1/4 tsp salt
2 eggs
1/2 c milk
2 tsp butter or margarine (melted)

Powdered sugar or warm maple syrup (optional)

Instructions:
Preheat oven to 400 degrees. Spray small oval baker with nonstick cooking spray. For apple filling, peel, core and slice apple into thin quarters. Melt butter in small saute pan over medium heat. Add apple, brown sugar and cinnamon. Cook 20 minutes or until apple is very tender and most of the liquid has evaporated.

Meanwhile, for pancake, combine flour, sugar and salt in a medium mixing bowl. Then whisk together eggs, milk and melted butter in a small mixing bowl. Add egg mixture to flour mixture; whisk until dry ingredients are moistened. (Batter will still be slightly lumpy.) Pour batter into baker. Spoon apple mixture evenly over batter. Bake 20-23 minutes or until puffed and golden brown. Remove from oven; sprinkle with powdered sugar, if desired. Cut into wedges and serve with maple sypup, if desired.

Yield: 2 servings

Notes: I didn't change a thing, because baking is a science...and science kind of scares me.

Thursday, August 21, 2008

Florentine Cookie Towers


So....the wedding is over. And we love dessert. Wedding Over + Love Dessert = Dessert Every Night :) But I like to try different ones all the time, so this recipe out of Pampered Chef's Cooking for Two was perfect! It looked light and yummy and it was!

1 Tbsp butter, melted
1 Tbsp corn syrup
1 Tbsp flour
1 Tbsp sugar
2 Tbsp finely chopped almonds
1/2 c ice cream
1/2 c fresh berries (straw, blue, or rasp)

Preheat oven to 350 degrees. Line a cookie sheet or stone with parchment paper. Whisk together butter, corn syrup, flour and sugar. Divide mixture evenly into two circles on the parchment paper. Spread evenly into 5 inch circles at least 2 inches apart from each other, sprinkle with almonds.

Bake 13-15 minutes or until deep golden brown. Remove from oven, immediately cut each circle in half using a pizza cutter. Slide parchment paper onto a cooling rack and then lay each cookie half over a clean pop can (or a round drinking glass). Cool completely.

For each serving, place one scoop of ice cream onto serving plate. Stand up two cookie halves, surrounding ice cream to form a tower. Top with berries and sprinkle with almonds and or powdered sugar.

Makes 2 servings.

My notes: I used round drinking glasses instead of pop cans...that seemed easier than digging out pop cans and cleaning them. And...unfortunately I forgot to sprinkle with powdered sugar. This was really yummy, but next time I will definitely drizzle chocolate syrup over the top. That would make it TO DIE!

America's Favorite Pot Roast


So I had that other half of the roast we had last week hanging out in the freezer. I decided to thaw it out and cook the other beef recipe that looked good in my Crock Pot cookbook. They've deemed it "America's Favorite," but I think it needs more seasoning. Both Carl and I agree that next time I will either add a package of onion soup mix (thanks Mon) or coat the top with mustard. But all in all....this was a good, tender pot roast!

3 1/2 to 4 pound boneless pot roast
1/4 cup flour
2 teaspoons salt
1/8 teaspoon pepper
3 carrots, pared, sliced lengthwise and cut into 2-inch pieces
3 potatoes, peeled and quartered
2 small onions, sliced
1 stalk celery, cut into 2-inch pieces
10 button mushrooms, sliced

Trim all excess fat from roast; brown and drain if using chuck or
another highly marbled cut. Combine 1/4 cup flour, the salt and pepper.
Coat meat with the flour mixture. Place all vegetables except
mushrooms in Crock-Pot and top with roast (cut roast in half, if
necessary, to fit easily). Spread mushrooms evenly over top
of roast. Cover and cook on Low for 10 to 12 hours.

Servings 4

Notes: So what did I do different? For starters, my roast was only 2lbs, so I cut the cooking time to about 6.5 hours. It was well done at that point, still very tender, but well. Next time I will start checking it at 5 hours. I dashed the top with thyme and paprika, but again, next time I'll add onion soup mix or coat the top with mustard- I think either will do the trick to give it a little kick! Lastly, don't forget the salt and pepper to taste...it needs a little more oomph.

Wednesday, August 20, 2008

Chicken & Asparagus Risotto Skillet


I'm continuing to find new recipes to try and I must say, so far so good. We have a friend in culinary school that came over last winter and made us the most delicious risotto. OMG it was good. Well...I didn't exactly want to compete with that, but I've been dying to have risotto again! So when I stumbled across this quick recipe, I knew I had to try it. I was so determined to make this that even after my asparagus in the fridge went bad and Meijer was out- I made an extra stop at Kroger just to make sure I had all the ingredients! This was the perfect coming home meal for Carl who has been gone all week!

4-6 boneless, skinless chicken breasts
1/2 tsp. salt, divided
1/8 tsp. pepper
1 tsp. olive oil
1/3 cup onion, chopped
2 cloves garlic, pressed
2 oz. fresh Parmesan cheese, grated
1 T lemon zest
2 cups milk
1 can Cream of Chicken soup
1/2 lb. fresh asparagus cut into 1 1/2 inch pieces
2 cups instant long-grain rice

Season chicken with 1/4 tsp. salt and pepper. Heat olive oil in skillet and cook chicken 5-7 minutes on each side or until chicken is no longer pink.

Remove chicken from skillet; keep warm. Add milk, soup, asparagus, onion, garlic. cheese, lemon zest and remaining 1/4 tsp. salt to skillet. Bring to a boil; reduce heat and simmer 3 minutes.

Stir in rice; top with chicken. Cover pan; remove from heat. Let stand 5 minutes. Serves 4-6.
This is yet another recipe from Pampered Chef (I have a bunch of the cookbooks).

Notes: I actually used 3/4 c of cheese because I just love cheese and an extra clove of garlic...well because I love garlic. You could definitely taste the lemon zest every once in awhile- which was an awesome flavor addition- but if you aren't a fan I think you could easily leave it out. From start to finish, this took me 45 minutes- not bad.

Carl loved it. I'm a fan. It will stay in our regular rotation. (He thought he would be funny and give the wine glass bunny ears...he didn't know he was in the picture :) )

Thursday, August 14, 2008

Mom's Apple Crisp


I wanted to make something special for dessert tonight. We've been lazy and just making little chocolate malts, but tonight we are dog sitting so we decided to take Buster for a walk to Kroger and get some fun stuff.

Ok, another Pampered Chef recipe.
4-6 Granny Smith apples
8 graham crackers, finely chopped
3/4 c packed sugar
1/2 c all purpose flour
1/2 c quick or old fashioned oats
1 tsp ground cinnamon
1 tsp nutmeg
1/2 c butter or margarine
ice cream is optional


1. Peel, core and slice apples using. Cut apples in half; place in Deep Dish Baker (This is a PC stoneware dish that can go in the microwave or oven).
2. Finely chop graham crackers using Food Chopper; place in Classic Batter Bowl. Add brown sugar, flour, oats, cinnamon and nutmeg; mix well. Place butter in microwave on HIGH 1 minute or until melted. Add butter; mix well.
3. Sprinkle graham cracker mixture evenly over apples. Microwave on HIGH 12-15 minutes or until apples are tender, rotating dish after 6 minutes. Cool slightly; serve warm topped with whipped cream or ice cream, if desired.
Yield: 10 servings

My notes: Well there are only 2 of us, so I cut this pretty much in half, and used the small oval stoneware from PC. It only needed 7 minutes in the microwave and it was delish! Oh and in my opinion- the ice cream is a MUST!
Blog Widget by LinkWithin